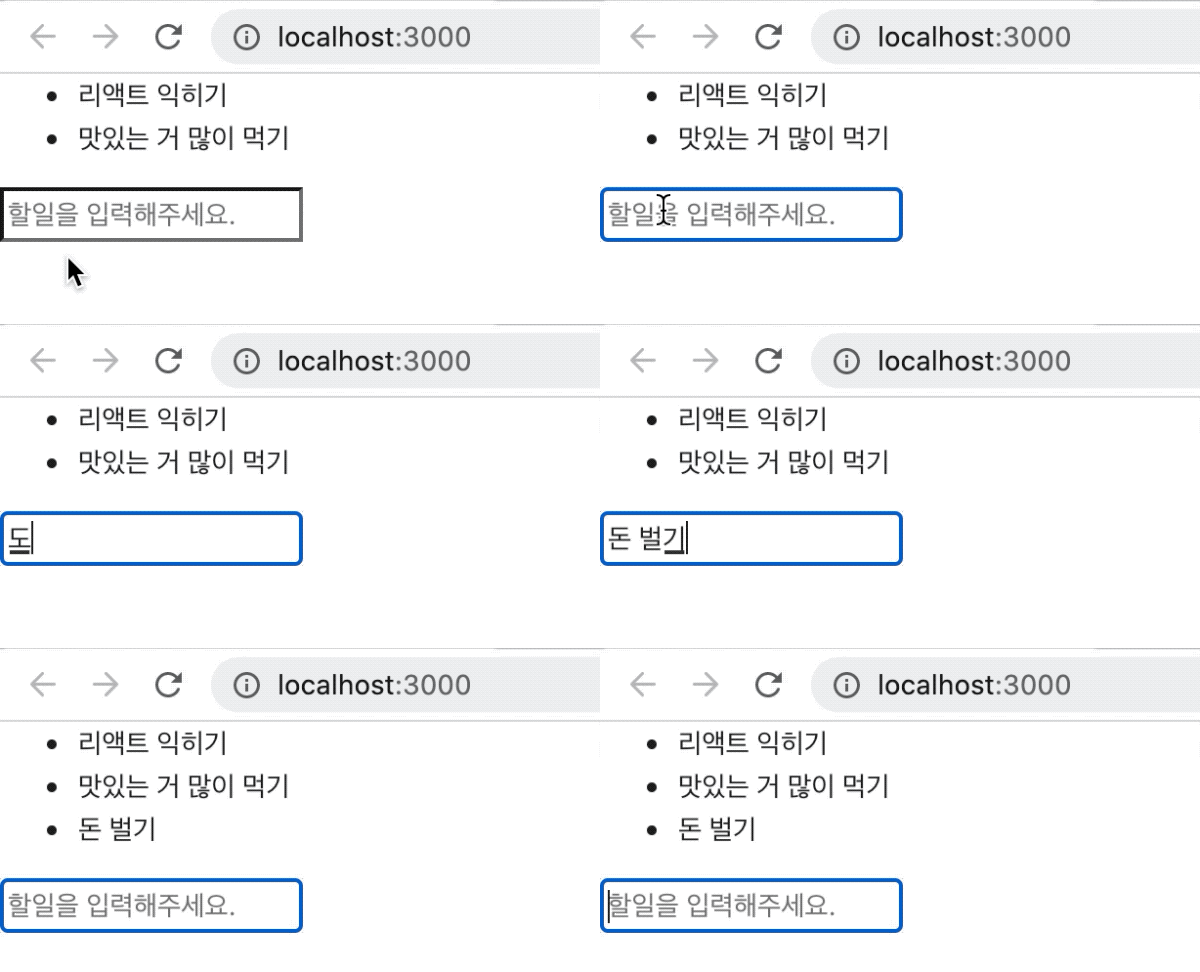
기본(aka 못생긴) Todo 리스트

- 리스트 항목을 개별 컴포넌트로 분리
- input 박스에 value 입력하면 current에 반영
- 엔터키를 입력하면 todoList에 추가하되, 아무것도 입력하지 않았을 때, 공백만 입력했을 때는 추가되지 않도록 조건 제한
- todoList 반영 후에는 current 상태값을 ”로 만들고(일종의 초기화), input 박스도 비워지도록 current 상태값(”)을 input 태그 value에 넣어준다
import React from "react";

// Todo 리스트 개별 항목은 별도 컴포넌트로 분리
const TodoItem = ({ todo }) => <li>{ todo }</li>

class TodoList extends React.Component {
  state = {
    todoList: ['리액트 익히기', '맛있는 거 많이 먹기'],
    current: '',
  }

  onChange = (e) => {
    const { value } = e.target;
    this.setState({
      current: value,
    });
  };

  onKeyDown = (e) => {
    if ( e.keyCode === 13 ) {  // keyCode 13번은 엔터키
      const { todoList, current } = this.state;
      if ( current.trim().length > 0 ) {
        this.setState({
          current: '',
          // todoList array에 push하는 식으로 상태값 직접 변경하지 말 것
          // ...로 스프레드해서 사용
          todoList: [...todoList, current.trim()],
        })
      }
    }
  }

  render() {
    return (
      <div>
        <ul>
          { this.state.todoList.map((todo, index) => {
            return (
              <TodoItem key={ index } todo={ todo } />
            );
          })}
        </ul>
        <input
          type="text"
          placeholder="할일을 입력해주세요."
          value={this.state.current}
          onChange={this.onChange}
          onKeyDown={this.onKeyDown}/>
      </div>
    )
  }
}

export default TodoList;
Todo 리스트 개별 항목(item) 컴포넌트는 위에 기술한 방법 외에도 여러 방식으로 짤 수 있다.
- 클래스형 컴포넌트
class TodoItem extends React.Component {
  render() {
    const { todo } = this.props;
    return (
      <li>{ todo }</li>
    );
  }
}- 함수형 컴포넌트
function TodoItem({ todo }) {
  return <li>{ todo }</li>
}
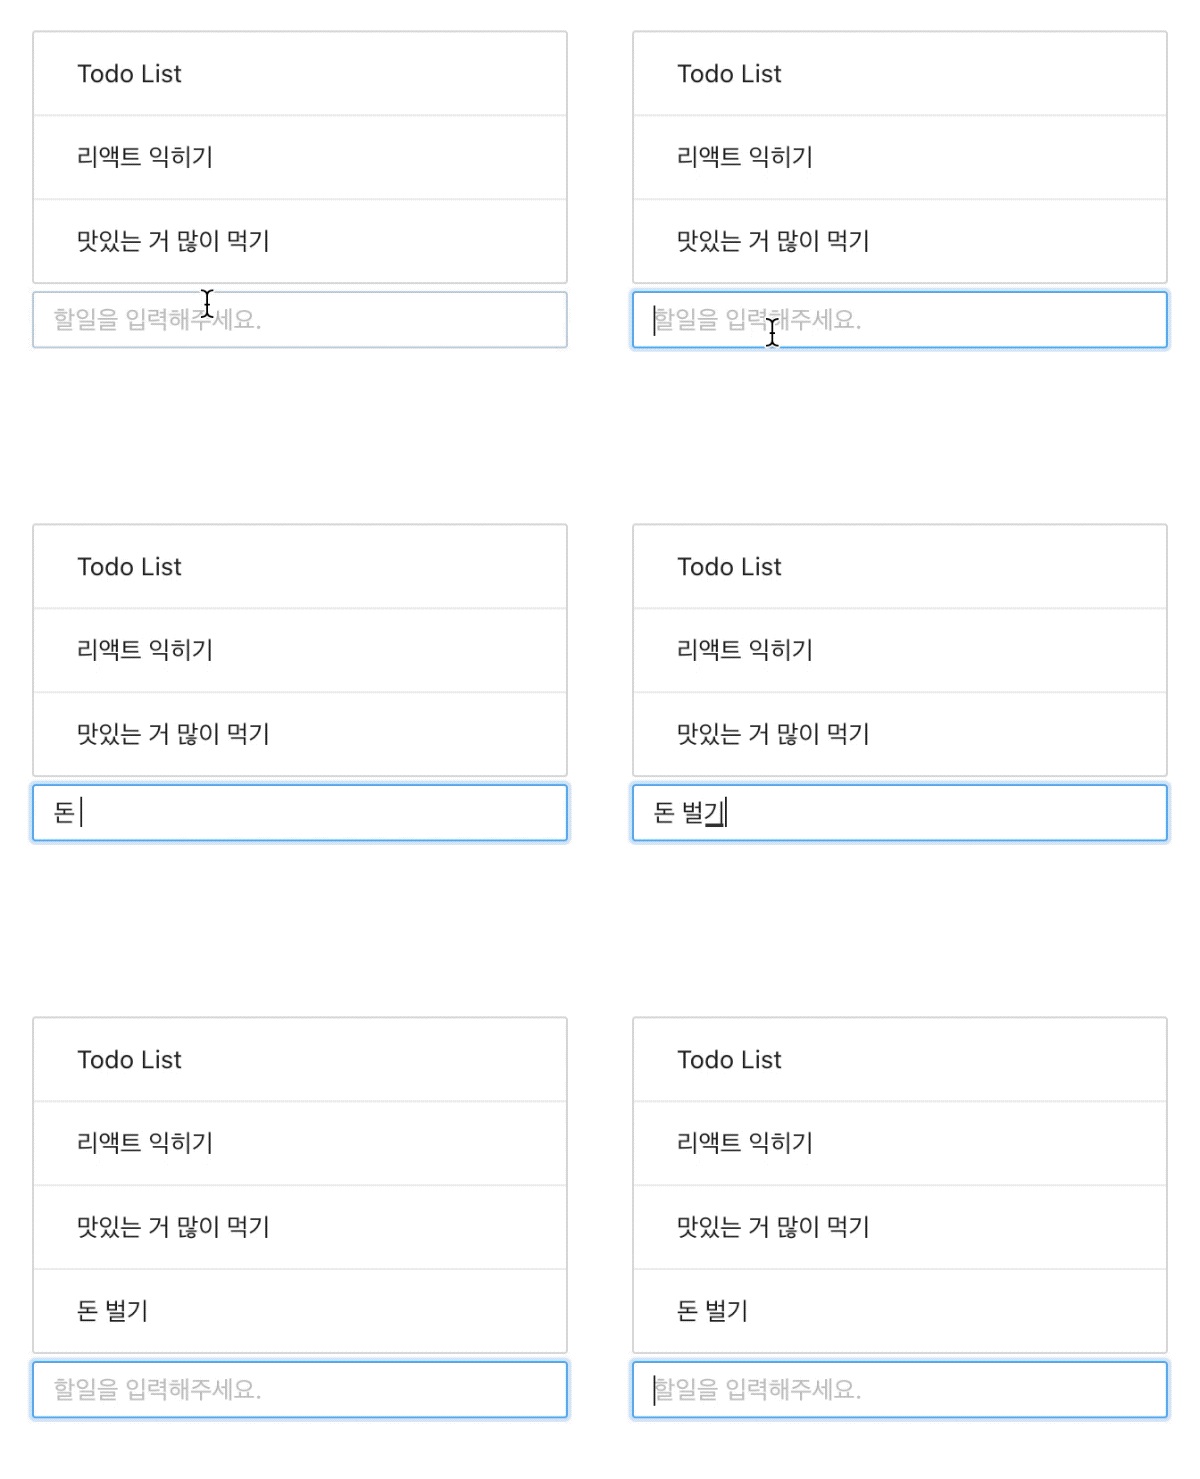
Ant Design 적용한 Todo 리스트
Ant Design을 적용해서 좀 더 보기좋은 Todo 리스트를 만들 수 있다.

기본 Todo 리스트와 대부분 동일하지만 antd의 List, Input 컴포넌트를 사용한다는 것이 차이점이다.
import React from "react";
import "antd/dist/antd.css";
// antd에서 List와 Input 컴포넌트를 import 한다
import { List, Input } from "antd";

const TodoItem = ({ todo }) => <li>{ todo }</li>

class TodoList extends React.Component {
  state = {
    todoList: ['리액트 익히기', '맛있는 거 많이 먹기'],
    current: '',
  }

  onChange = (e) => {
    const { value } = e.target;
    this.setState({
      current: value,
    });
  };

  onKeyDown = (e) => {
    if ( e.keyCode === 13 ) {
      const { todoList, current } = this.state;
      if ( current.trim().length > 0 ) {
        this.setState({
          current: '',
          todoList: [...todoList, current.trim()],
        })
      }
    }
  }

  render() {
    return (
      // div 태그 안쪽 List, Input 컴포넌트가 Ant Design을 적용한 부분
      <div style={{ width: '300px', margin: '30px auto' }}>
        <List
          header={"Todo List"}
          dataSource={this.state.todoList}  // Todo 항목 초기값
          bordered  // 바깥상자선. bordered={true}와 같은 의미
          renderItem={todo => (
              <List.Item>
                  { todo }
              </List.Item>
          )}  // List.Item에 Todo 개별 항목 입력
          style={({
              marginBottom: '4px'
          })}  // 리스트와 input 박스 간격
        />
        <Input
          type="text"
          value={this.state.current}
          placeholder="할일을 입력해주세요."
          onChange={this.onChange}
          onKeyDown={this.onKeyDown}
        />
      </div>
    )
  }
}

export default TodoList;