axios 라이브러리란
Promise 패턴을 지원하는 HTTP 클라이언트. nodejs와 브라우저 사이에서 사용한다.
axios 라이브러리 사용하기
설치
yarn add axios활용
- 2번째 줄
axios get()에는 메소드명(get, post 등)을 넣는다. .then은 응답 성공 시(200대 status code) response를 받는 부분이다..catch는 에러를 받는다.
function getPost() {
  axios get("http://example.com/posts/12345/")
    .then(reponse => {
      console.log(response);
    })
    .catch(error => {
      console.error(error);
    })
}
위 코드는 async/await를 이용한 아래 코드와 유사하게 동작한다.
async function getPost() {
  try {
    const response = await axios get("http://example.com/posts/12345/");
    console.log(response)
  }
  catch (error) {
    console.log(error);
  }
}- await는 반드시 함수 안에서 써야하며, 그 함수는 반드시 async 함수여야 한다.
axios를 사용해 실제 API 호출하기
import React from "react";
import Axios from "axios";

class EpisodeList extends React.Component {
  state = {
    episodeList: [],
  }

  // API 호출은 commit 단계에서 수행하므로 componentDidMount() 사용
  componentDidMount() {
    const apiUrl = "http://api.tvmaze.com/singlesearch/shows";
    const params = {
      q: 'mr-robot',
      embed: 'episodes',
    }
    Axios.get(apiUrl, { params })  // promise 객체 반환
      .then(response => {
        const { data: { _embedded: { episodes } } } = response;
        this.setState({
            episodeList: episodes
        });
      })
      .catch(error => {
        console.error(error);
      })
  }

  render() {
    const { episodeList } = this.state;
    return (
      <div>
        <h1>
          Episode List
        </h1>
        {JSON.stringify(episodeList)}
      </div>
    )
  }
}

export default EpisodeList;
호출한 API 구조를 보면 이렇다.
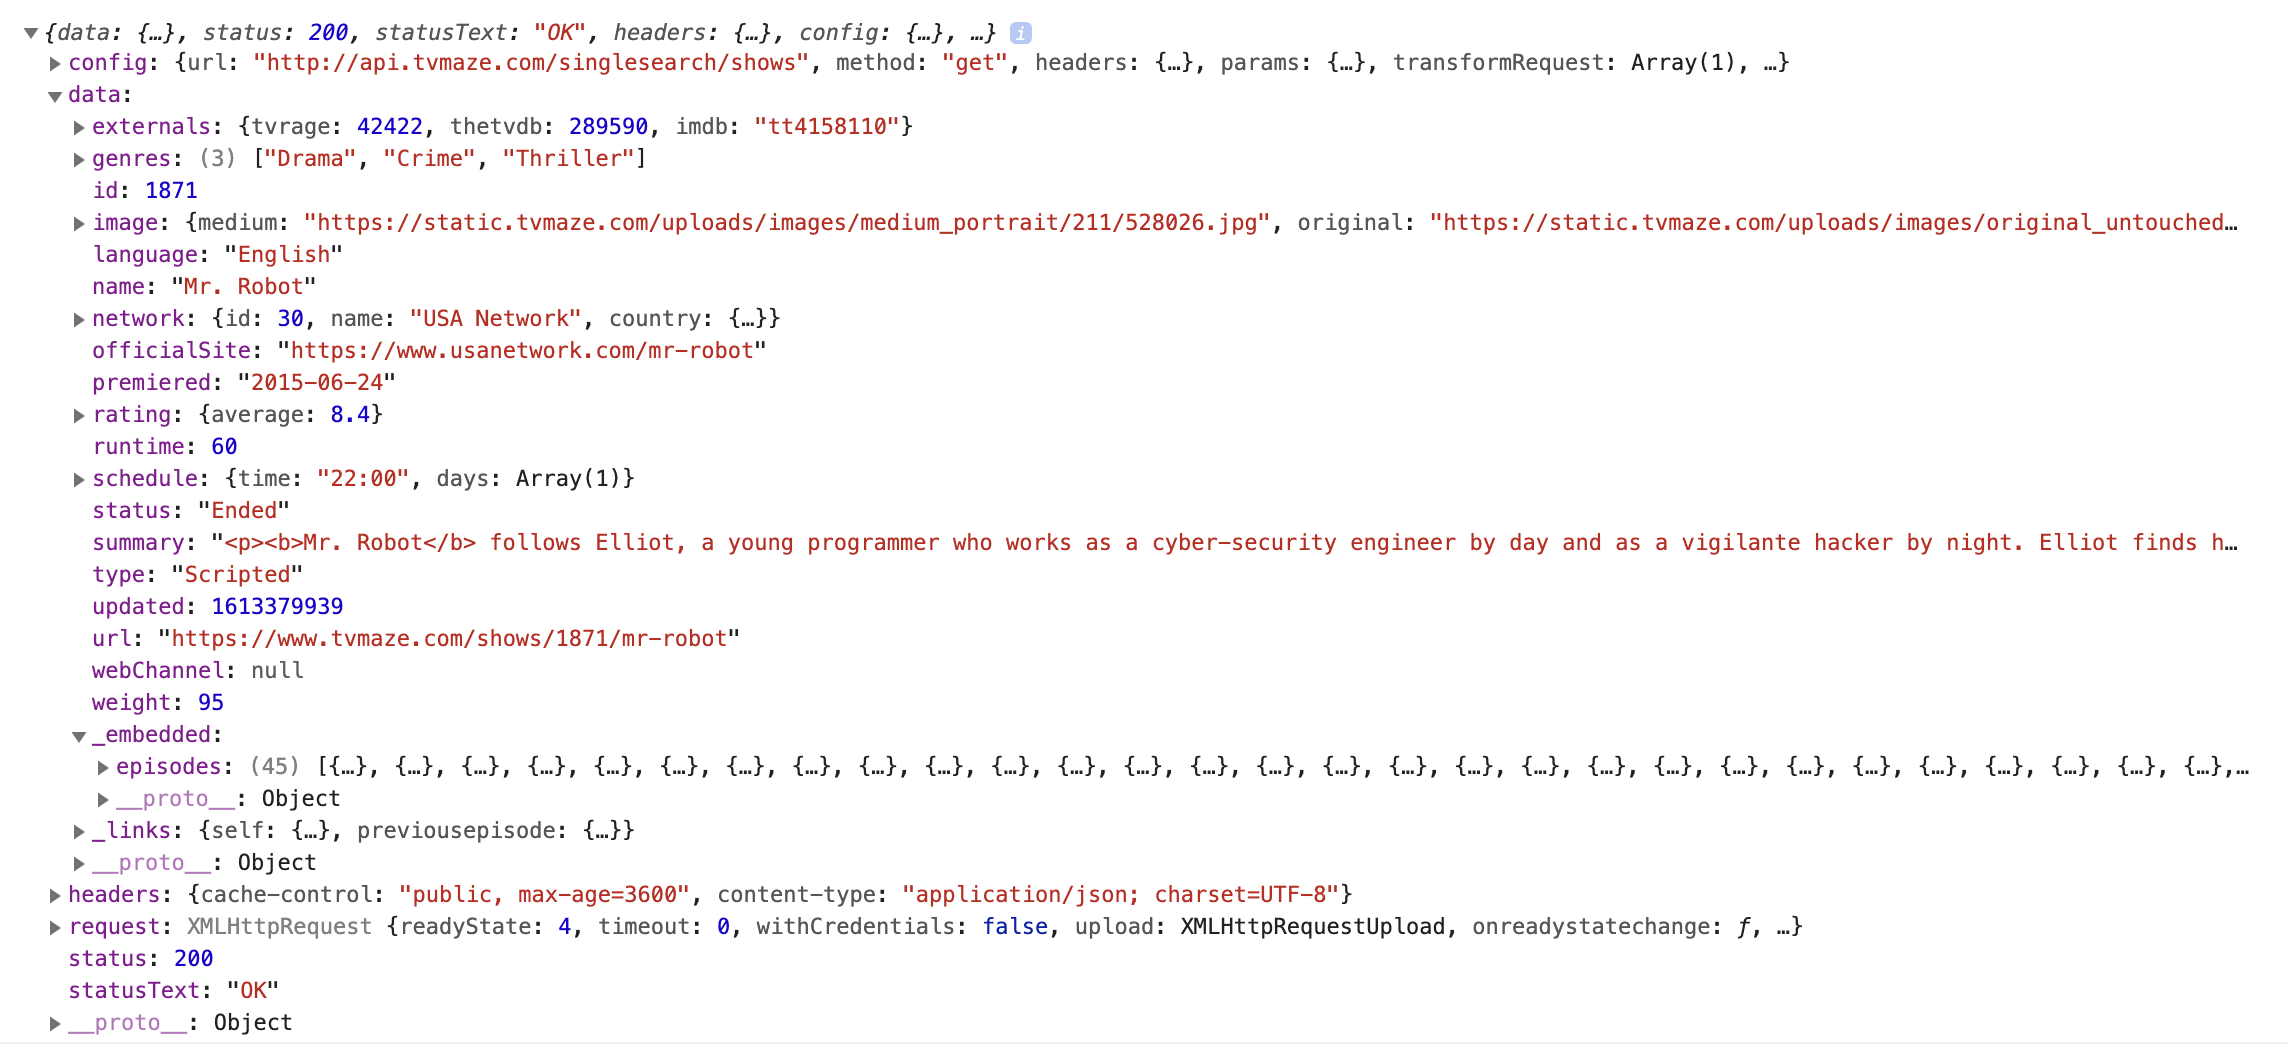
data 객체 안에 _embedded 키가 있고 그 값인 객체 안에 episodes 키가 있다. episodes 키의 값으로 에피소드 목록이 담긴 객체가 반환되므로 그 객체를 episodeList 상태값으로 반영한다. (setState 이용)
화살표 함수라 this가 바뀌지 않기 때문에 setState 사용 가능하다.
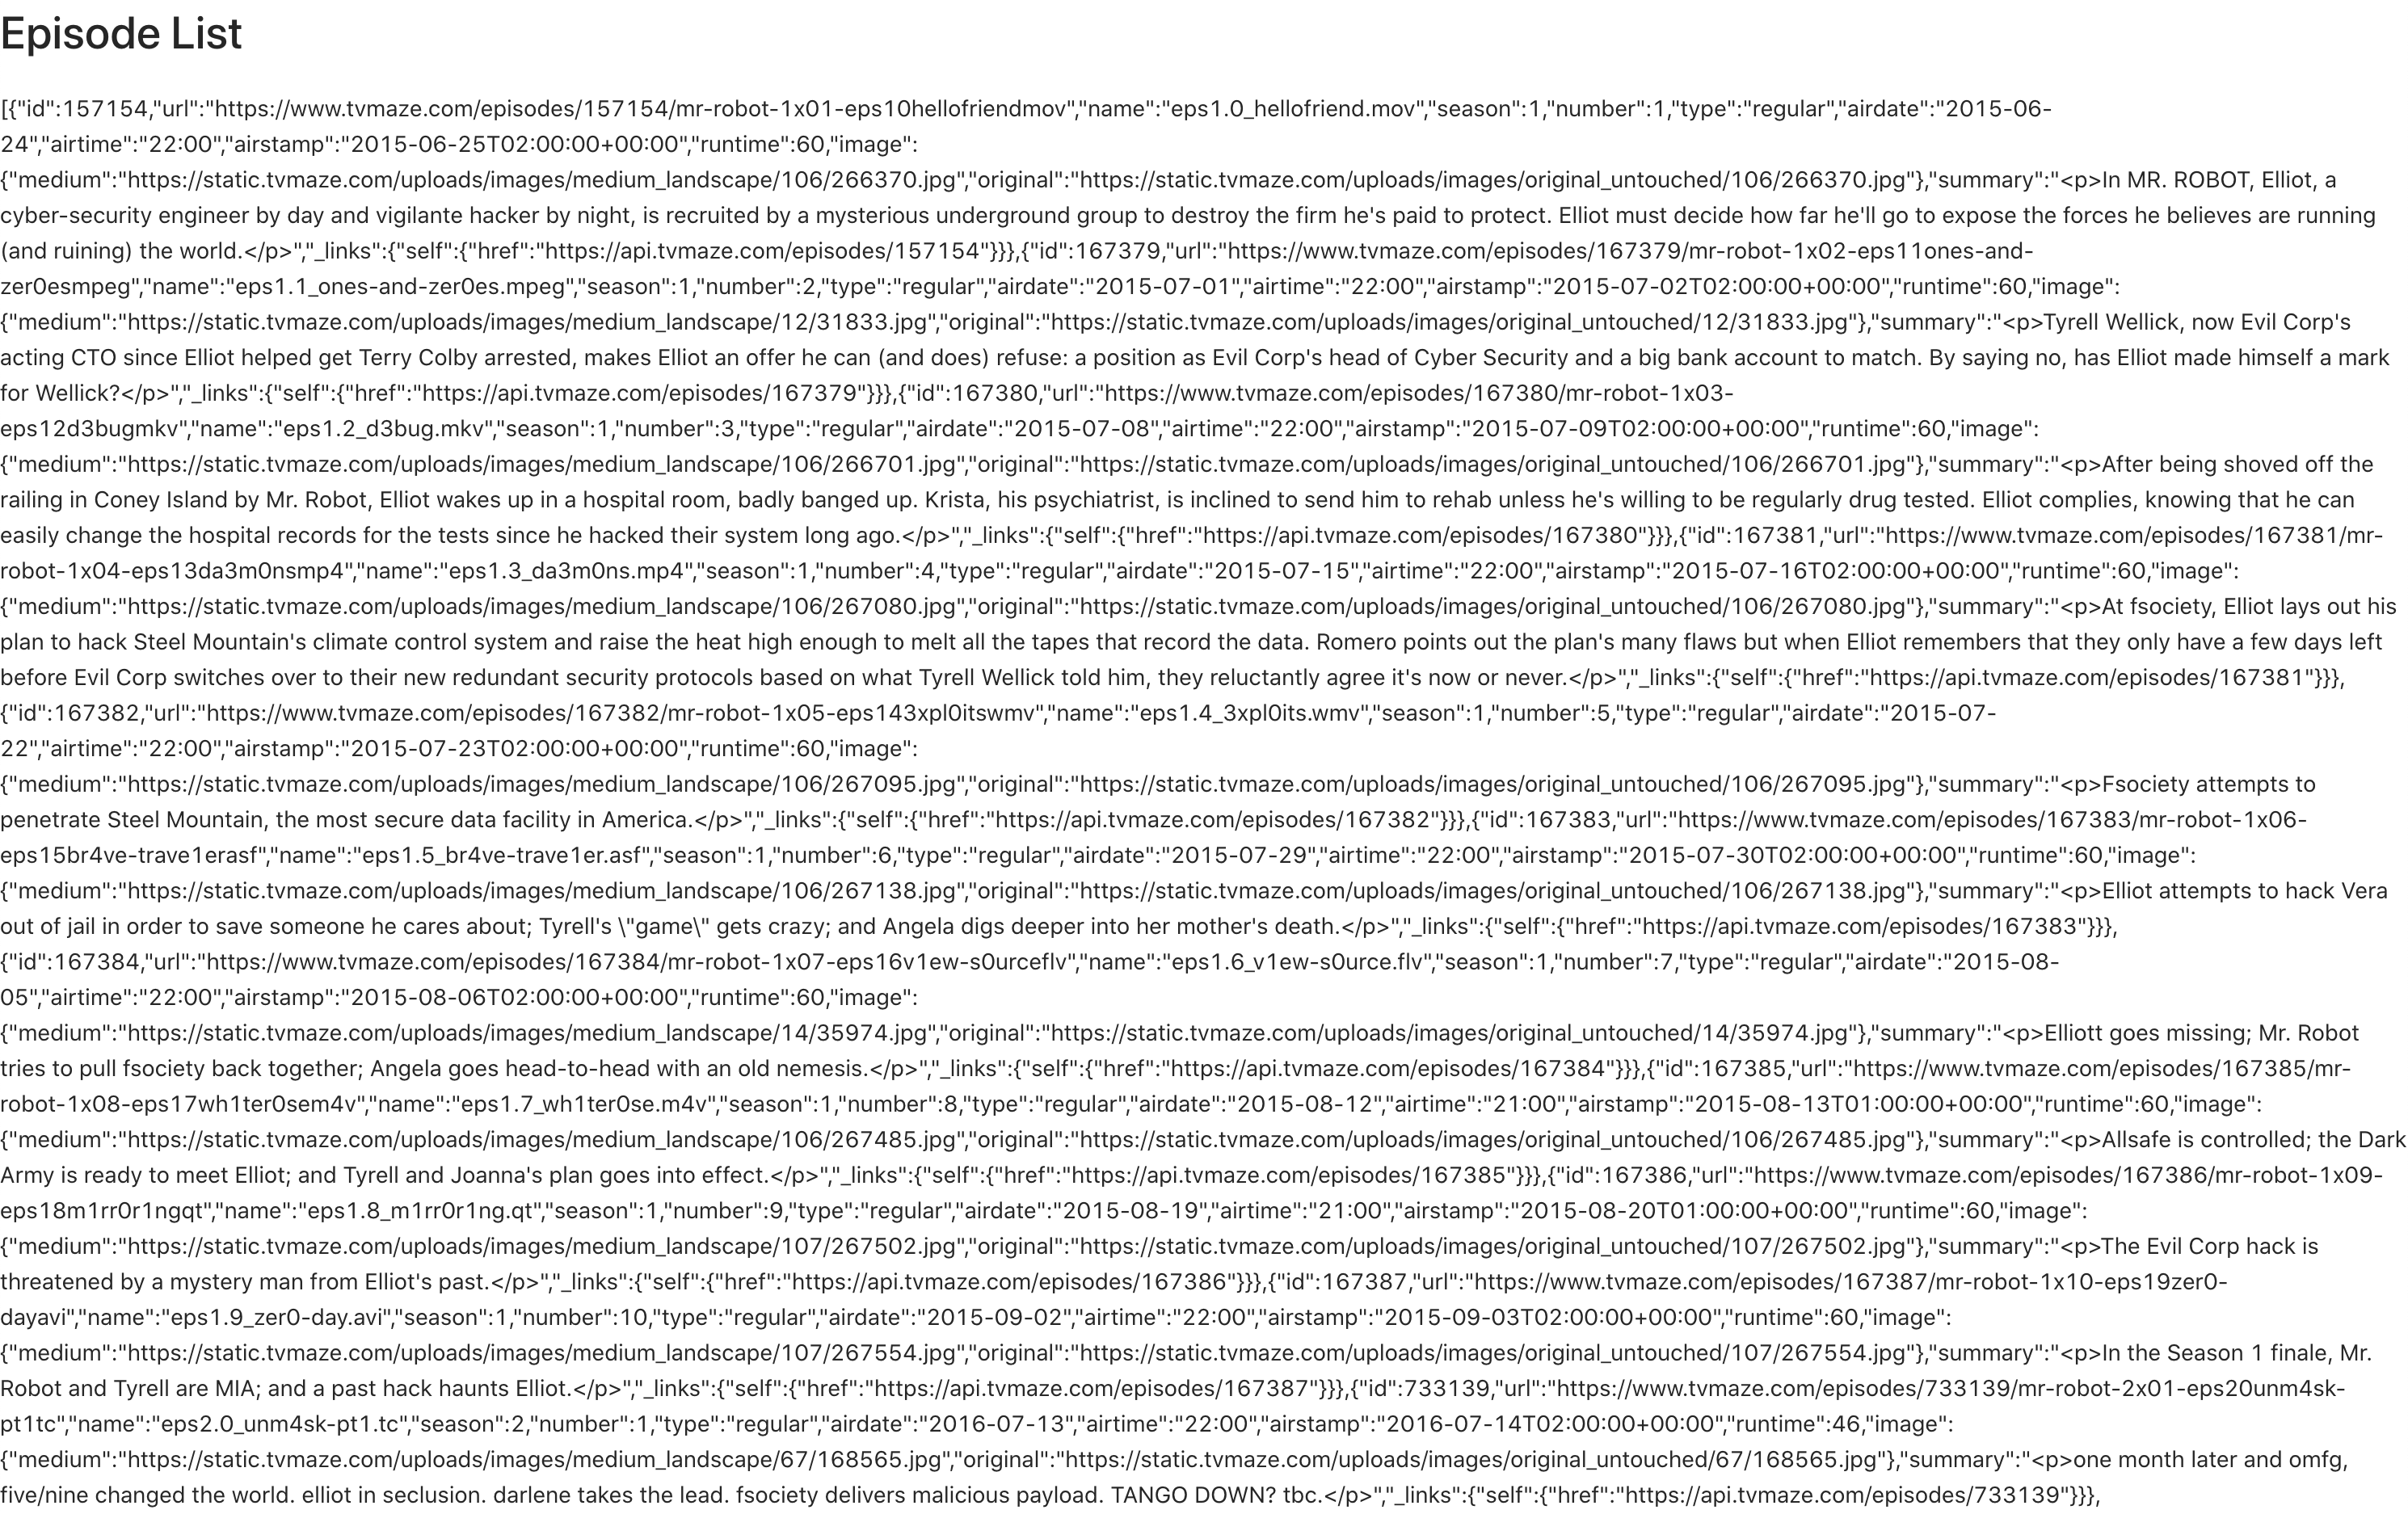
직렬화한 episodeList도 이렇게 확인할 수 있다.
참고) Response Schema
{
  data: {},
  status: 200,
  statusText: 'OK',
  headers: {},
  config: {},
  request: {}
}- data: 서버 응답 JSON 객체
- state: 서버 응답 HTTP 상태 코드
- statusText: 서버 응답 HTTP 상태 메시지
- headers: 서버 응답 헤더. 모든 헤더명은 소문자
- config: 요청에 사용된 axios 설정
- request: 요청 객체
async/await 이용하기
동작은 똑같다.
import React from "react";
import Axios from "axios";

class EpisodeList extends React.Component {
  state = {
    episodeList: [],
  }

  async componentDidMount() {
    const apiUrl = "http://api.tvmaze.com/singlesearch/shows";
    const params = {
      q: 'mr-robot',
      embed: 'episodes',
    }
    try {
      const response = await Axios.get(apiUrl, { params });
      const { data: { _embedded: { episodes } } } = response;
      this.setState({
        episodeList: episodes
      });
    }
    catch (error) {
      console.error(error);
    }
  }

// 이하 render 부분 생략

export default EpisodeList;
API 이용해서 render 부분 발전시키기
새로운 컴포넌트를 하나 더 만들어서 에피소드 id와 이름, 그리고 썸네일 이미지를 화면에 렌더링하도록 수정했다.

import React from "react";
import Axios from "axios";

class EpisodeDetail extends React.Component {
  state = {
    episode: this.props.episode,
  }
  render() {
    // episode 값 객체에서 키가 id, name, image인 값만 빼온다.
    // image 값은 객체이므로 한 번 더 풀어준다. medium 값으로 이미지 주소가 있는데,
    // 좀 더 명확하게 thumbUrl이라는 변수로 지정해준다.
    const { episode: { id, name, image: { medium: thumbUrl } }} = this.state;
    return (
      <div>
        { id } : { name }
        <img src={ thumbUrl } />
      </div>
    );
  }
}

class EpisodeList extends React.Component {
  state = {
    episodeList: [],
  }

  async componentDidMount() {
    const apiUrl = "http://api.tvmaze.com/singlesearch/shows";
    const params = {
      q: 'mr-robot',
      embed: 'episodes',
    }
    try {
      const response = await Axios.get(apiUrl, { params });
      const { data: { _embedded: { episodes } } } = response;
      this.setState({
        episodeList: episodes
      });
    }
    catch (error) {
      console.error(error);
    }
  }

  render() {
    const { episodeList } = this.state;
    return (
      <div>
        <h1>
          Episode List
        </h1>
        {
          episodeList.map(episode =>
              // 추가한 EpisodeDetail 컴포넌트 추가
              <EpisodeDetail episode={ episode } />
          )
        }
      </div>
    )
  }
}

export default EpisodeList;
axios 기본 config 파일 생성해서 적용하기
별도 js 파일로 axios 기본 설정값을 지정할 수도 있다. 기본 설정값이란 컴포넌트에서 공통으로 사용할 값을 말한다.
// EpisodeAPI.js

import Axios from "axios";

const instance = Axios.create({
  baseURL: 'http://api.tvmaze.com',
  timeout: 3000,
});

export default instance;
기존 EpisodeList.js에서는 아래 부분을 수정해준다.
- EpisodeAPI 임포트
- EpisodeAPI.js에서 axios import 했으므로 여기서는 axios 임포트 생략
- EpisodeList 컴포넌트에서 await Axios.get()으로 response 받아오던 부분을 await EpisodeAPI.get()으로 수정
// EpisodeList.js

import React from "react";
import EpisodeAPI from "EpisodeAPI";

class EpisodeDetail extends React.Component {
  // 컴포넌트 내용 생략
}

class EpisodeList extends React.Component {
  state = {
    episodeList: [],
  }

  async componentDidMount() {
    const apiUrl = "/singlesearch/shows";
    const params = {
      q: 'mr-robot',
      embed: 'episodes',
    }
    try {
      // await 부분 수정
      const response = await EpisodeAPI.get(apiUrl, { params });
      const { data: { _embedded: { episodes } } } = response;
      this.setState({
        episodeList: episodes
      });
    }
    catch (error) {
      console.error(error);
    }
  }
  // 이하 생략
}

export default EpisodeList;
결과물은 동일하다.